 JawAtlas
Guide
A four-week CBCT study plan for dental students
After four weeks on this plan you will read axial, coronal and sagittal slices without hesitating, find the main anatomy of the mandible on the demo scan, and have a reading routine you can apply to any scan.
How to use this plan
Each week has one guide to read first and three exercises in JawAtlas, each naming the stage, the tool and what to look for. Every exercise uses the bundled demo scan, so there is nothing to import until the last week (see the demo scan). Plan three short sessions a week: read, do, repeat from memory. Save a moment at the end of each exercise with a caption; by week four you will have a set to replay as your own revision deck (see saving and replaying moments).
Week 1: orientation and the three planes
Read first: how to read a CBCT scan, then radiological orientation conventions. The aim is to know which way is which in every pane and how the three planes relate.
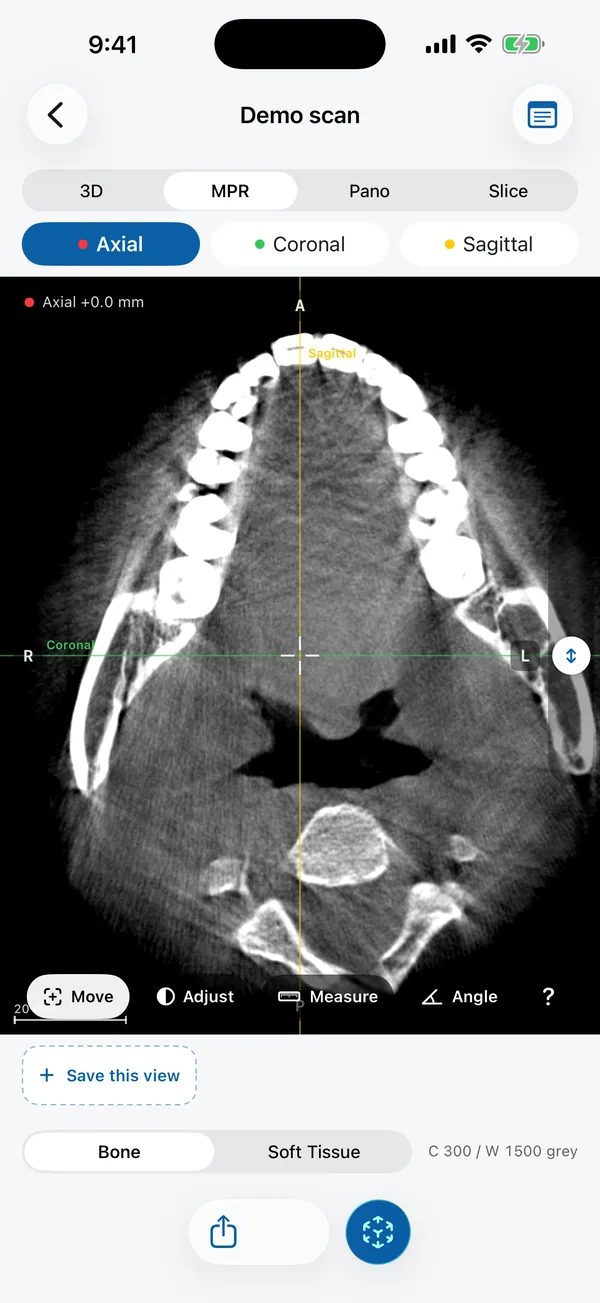
- The full pass. MPR stage, Axial, Move mode. Drag the slider from the lower border to the top of the volume without stopping, naming what passes: inferior border, canal, roots, crowns, upper teeth, the edge of the maxilla. Check by the R and L labels that the patient's left is on your right.
- One point, three planes. MPR stage, Move mode. Put the white crosshair on the lower right first molar on an axial slice, then switch to Coronal and Sagittal. Confirm the same tooth is under the crosshair in all three and watch the coloured scout lines show where the other planes cut (see tri-planar MPR).
- The whole jaw at once. 3D stage, Bone preset. Drag to rotate, pinch to zoom, double-tap to reset. Find the left posterior edentulous site, then find it again on an axial slice in MPR.
Week 2: window, level and the panoramic view
Read first: window, level and grey values, then how the panoramic view is reconstructed. This week is about making structures visible, and about the view that follows the curve of the jaw.
- Find the window that shows the canal rim. MPR stage, Coronal through the first molar, Adjust mode. Drag left and right for width and up and down for level until the dark circle of the mandibular canal below the roots has a clear bright rim. Read the "C / W grey" readout: grey values, not Hounsfield units (see adjusting window and level).
- Bone against soft tissue. MPR stage, Axial at root level. Tap the Soft Tissue preset and find the tongue, cheeks and airway, then tap Bone and watch them disappear. Say in one sentence what the two presets do differently.
- Trace the arch. Pano stage. On a fresh install the first visit opens the tracing view: tap six or seven points along the alveolar process from one molar region to the other and tap "Show panoramic". Drag the yellow scout line and watch the cross-section below it and its readout in millimetres along the arch (see tracing the dental arch).
Week 3: the anatomy of the mandible
Read first: finding the mandibular canal, and for the third exercise impacted third molars on CBCT. This is the week the planes pay off: every structure here is found by choosing the right plane.
- Follow the canal from end to end. Pano stage, scout line. Start the cross-section at the ramus and step it forward a few millimetres at a time, watching the dark dot of the canal move from lingual to buccal and rise to the mental foramen. Save a moment at the mandibular foramen, in the molar region and at the exit.
- Both mental foramina. MPR stage, Axial, Move mode. Scroll down from premolar root level on each side until a gap opens in the buccal cortex with a channel curving in behind it. Compare the levels of the two sides with the slice position readout.
- The top of the volume. MPR stage, Coronal and Sagittal. Scroll to the upper molar roots and see what the mandible-centred field of view includes above them: on some slices, the lowest part of the sinus floor (see the maxillary sinus on CBCT). Then find each lower third molar region and describe what you see.
Week 4: measuring, projections and artifacts
Read first: measuring length and angle, then maximum intensity projection and CBCT artifacts. The last week adds numbers, projections, and the habit of asking whether what you see is anatomy or the scanner.
- Measure and check. MPR stage, Axial at crown level, Measure mode. Tap two points across the lower first molar crown mesiodistally and read the length; around 10 to 11 mm is expected. Then switch to Angle and measure the angle between the long axes of two neighbouring teeth on a sagittal slice. Both tools live in the MPR panes only, so get to the right slice before you tap.
- A projection, not a slice. 3D stage, MIP mode. Rotate the jaw to a frontal view and compare it with the panoramic image from week two and with a single coronal slice. Say what each adds up and what it hides.
- Anatomy or scanner? MPR stage, Axial and Sagittal, Bone preset. Find a restoration and the streaks around it, then scroll to the edge of the field of view and see how the image changes there. Finally, import an openly licensed scan from another scanner and run the week one full pass on it (see free CBCT datasets and importing DICOM from Files).
After four weeks
Replay the moments you saved, in order. Add a case note to the demo scan summarising what you found, then share the case with a classmate or export the marked views as a PDF and ask them to find the same structures (see sharing a case and exporting a PDF). Teaching it to someone else is the best test. Next come the anatomy guides in the learn section and a second and third scan from the free datasets.
Questions students ask
How long does it take to learn to read a CBCT scan?
Reading the planes and conventions with confidence takes a few hours of practice spread over a couple of weeks. Recognising the main anatomy reliably takes longer and keeps improving with every scan. This plan takes a student from a first look to a steady reading routine in four weeks of short sessions.
Do I need my own CBCT scans to follow the plan?
No. Every exercise uses the demo scan bundled with JawAtlas, a full adult mandible with both rami and a traceable inferior alveolar canal. The last week adds an openly licensed dataset so you see a second scanner and a field of view that includes the maxilla.
How much time should I spend each week?
Three sessions of twenty to thirty minutes work well: read the guide for the week in the first session, do the exercises in the second, and repeat the exercises from memory in the third. Short sessions on consecutive days beat one long session.
Can I follow the plan on an iPad?
Yes. The exercises are the same, and the iPad shows the axial, sagittal and coronal panes with a live 3D view in a 2x2 grid, so the one point, three planes exercise in week one becomes a single glance. The iPhone shows one pane at a time with a plane switcher.
JawAtlas is an education and training aid. It is not a medical device and must not be used for diagnosis, treatment planning or any clinical decision.
Last reviewed 2026-10-14