 JawAtlas
Guide
How to read a CBCT scan: a routine for dental students
After this guide you will have a fixed order for working through any dental CBCT scan, so that no part of the volume is skipped and no finding is judged from a single slice.
A CBCT scan of the jaws is a block of tens of millions of voxels, and the structure you care about is rarely on the slice that happens to be open. Experienced readers do not look harder than beginners. They look in a fixed order, so that the same ground is covered every time. The routine below is built for learning, not for reporting. It uses JawAtlas as the example, but the order works in any viewer: orient, scroll, link, window, reformat, and only then render in 3D. It takes ten to fifteen minutes on an unfamiliar scan and much less once the habit has formed.
Step 1: orient yourself
Before you read anything, answer three questions. Which plane am I looking at? Which side of the screen is the patient's right? Where in the volume is this slice?
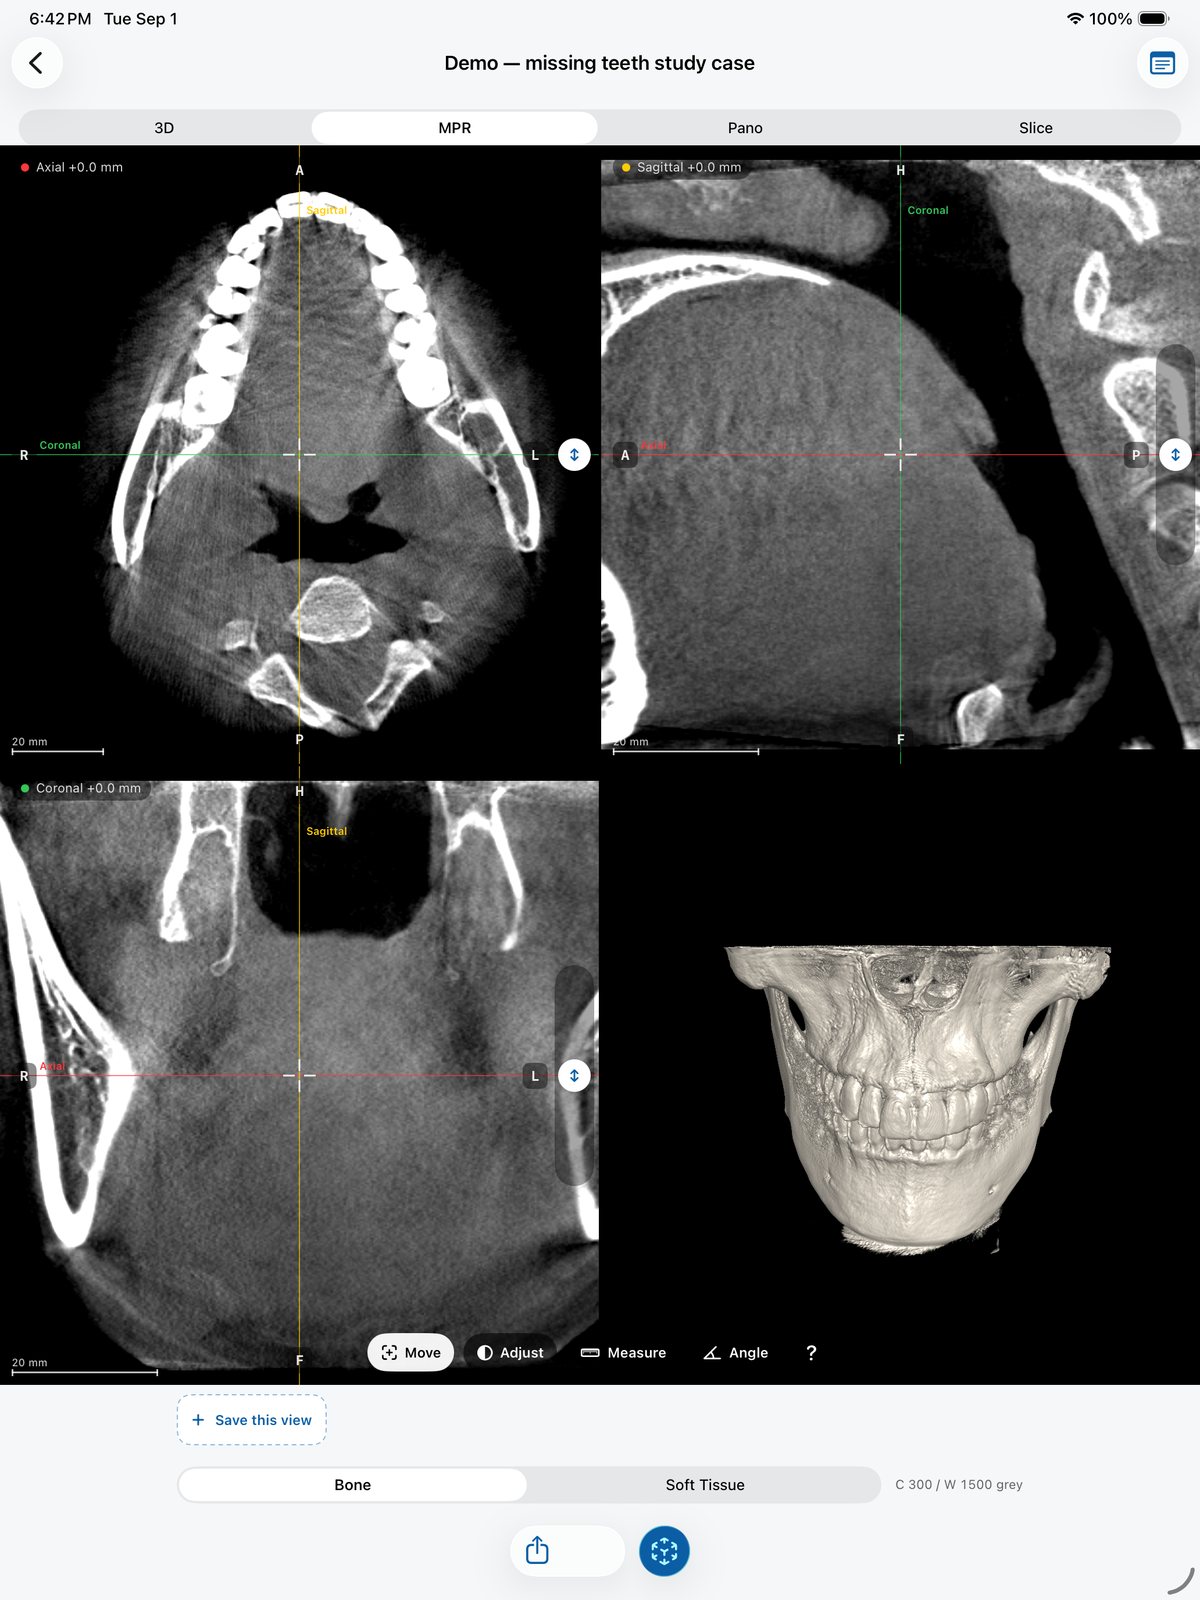
In the MPR stage the plane is named in the switcher, and each plane has its own colour: axial is red, coronal is green, sagittal is yellow. The edge labels R, L, A, P, H and F mark the patient's right, left, anterior, posterior, head and feet. On an axial slice the patient's left appears on your right, because radiology views axial slices from the feet. The slice position readout at the top left, for example "Axial +10.2 mm", tells you how far the slice sits from the centre of the volume.
Do this every time you open a case. Mistakes of side are the most common error in student reading, and they cannot be caught later if you never looked at the labels. The orientation conventions guide explains where these rules come from.
Steps 2 and 3: scroll every plane
Start in the axial plane and scroll from one end of the volume to the other without stopping to study anything. In JawAtlas the vertical slider on the right of the pane moves through the stack. The aim is to see the whole block once before you study any detail. On a mandible scan you will pass the condyles and coronoid processes, the rami, the body with the canal inside it, the roots, the crowns and the inferior border. Then make a second, slower pass and stop at each level that matters for your question: the apices, the canal, the mental foramen, and the sinus floor if the maxilla is included.
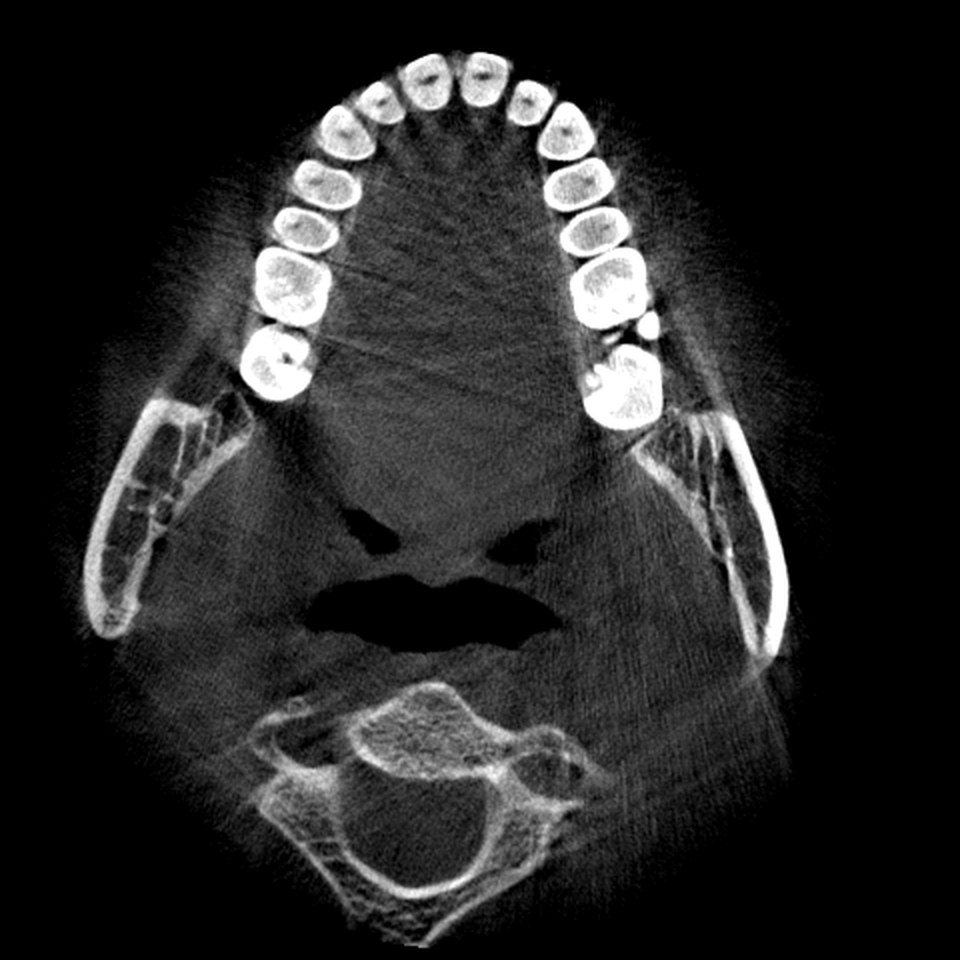
Now switch to the coronal plane and scroll from front to back, then to the sagittal plane and scroll from side to side, with the same fast pass and slow pass. Each plane answers a different question, so this is not repetition. Coronal slices compare left with right and show the buccal and lingual plates of both sides at once. Sagittal slices show the profile of the alveolar process and follow a root from crown to apex in one picture. The guide to the three planes describes what each shows well.
Step 4: link the planes with the crosshair
For each structure you want to understand, place the white crosshair on it in the plane where you found it, then look at the other two planes. The scout lines, drawn in the colour of the plane they represent, show exactly where the other slices cut through the current one. A dark spot on an axial slice might be a canal, a foramen, a radiolucency, or a partial volume effect at the edge of the cortex. The coronal and sagittal views through that same point tell you which.
This is the single most useful habit in CBCT reading: find in one plane, confirm in two. On iPad the 2x2 grid shows all three planes at once, with a live 3D pane in the fourth cell. On iPhone you switch planes with the Axial / Coronal / Sagittal control, and the crosshair position carries over. The tri-planar MPR guide covers the mechanics.
Step 5: window for bone, then for soft tissue
A bone window is the right default for teeth and cortical outlines. Before you move on, repeat the key levels in a soft tissue window. The Bone and Soft Tissue presets below the MPR pane switch between them, and Adjust mode lets you drag the level and width by hand. In a wide window the muscles, the floor of the mouth, the tongue and the airway become visible. In a narrow window small differences inside bone stand out and the soft tissue is lost to black.
Remember that CBCT grey values are not Hounsfield units. The numbers in the readout (for example "C 300 / W 1500 grey") describe how grey values are mapped to the screen, not tissue density, and they are not comparable between machines. The window and level guide explains why, and the how-to page shows the gestures.
Step 6: review a panoramic reconstruction and cross-sections
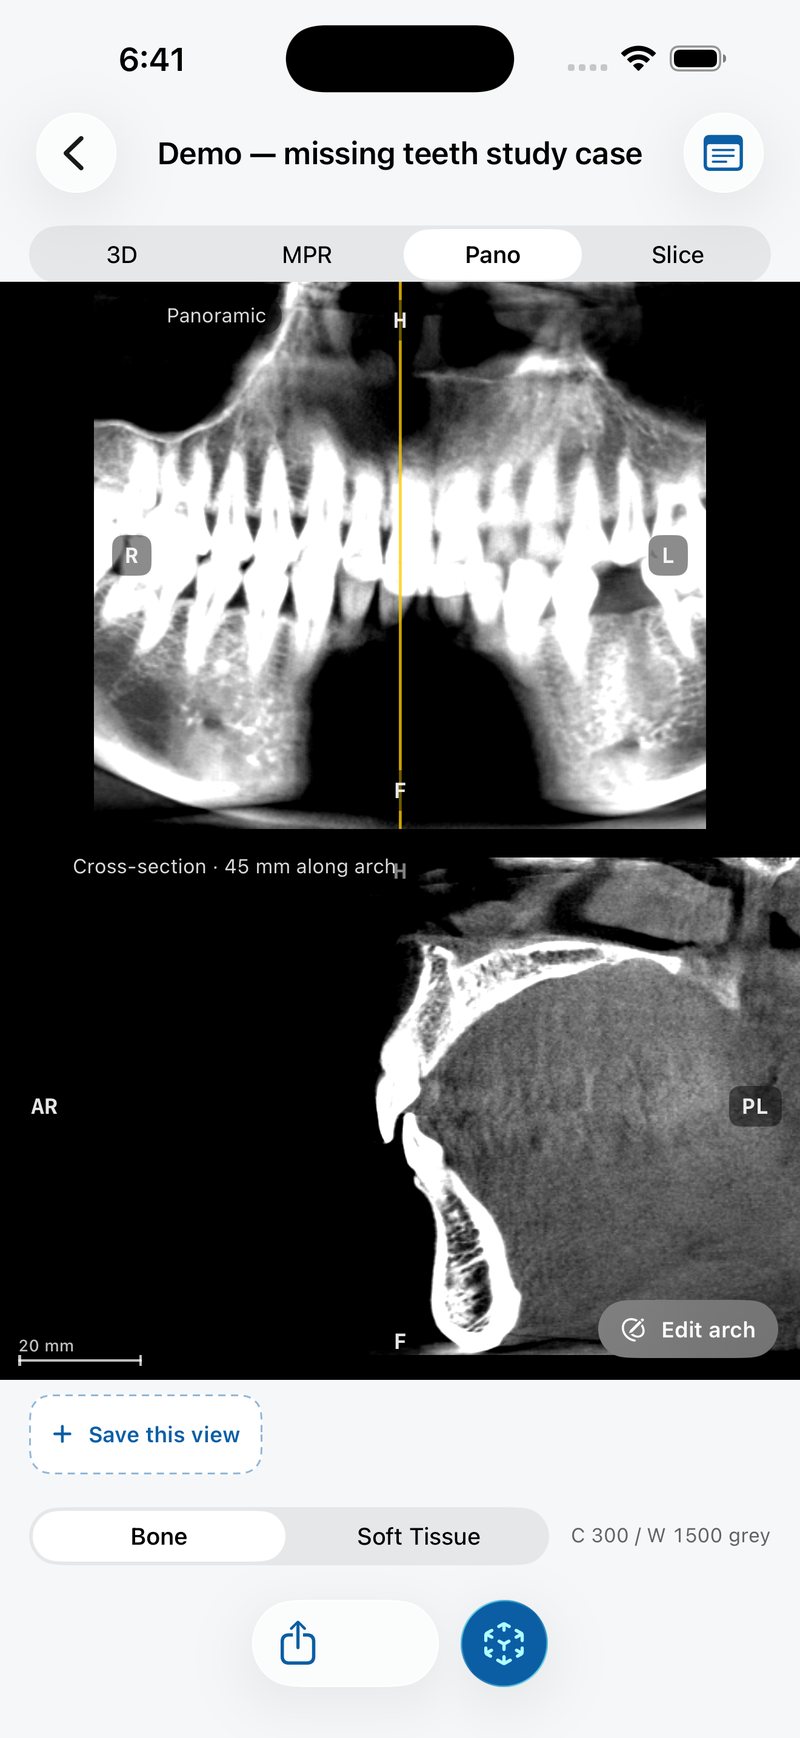
With the planes covered, build the view that most dental students know best. In the Pano stage, check that the arch curve runs through the middle of the alveolar process on the axial slice; retrace it with "Edit arch" if it drifts to the cheek or tongue side. The panoramic reconstruction follows the OPG convention: the patient's right is on the viewer's left, as on the axial slice, but the arch is now seen from the front rather than from the feet, so it appears the other way up.
The pano gives a familiar overview of the whole arch in one picture, but it flattens the buccal to lingual dimension. Drag the yellow scout line along it to step a perpendicular cross-section through the jaw in the pane below; the readout tells you how far along the arch you are. Cross-sections are where bone width, root inclination and the position of the mandibular canal are actually seen. See the panoramic reconstruction guide and the arch tracing how-to.
Step 7: 3D last, and why
Only now switch to the 3D stage. A volume rendering is persuasive: surfaces look solid, teeth look complete, and the eye accepts the picture as a photograph of the jaw. But the rendering is a choice. A transfer function decides which voxels are shown and which are hidden, so thin cortical bone can vanish at a bone preset, a root can appear to end early because its apex is less dense than the rest, and metal artifacts can grow spikes that do not exist.
Used after the slices, 3D is an excellent way to put what you found into a spatial picture: the course of a canal, the position of an impacted tooth. Used before the slices, it tends to decide what you will see. Drag to rotate, pinch to zoom, try the Bone, Teeth and Soft tissue presets, and switch to MIP for a radiograph-like projection. The MIP guide explains what that mode shows and hides. Then go back to the slice that raised the question and confirm it there.
The checklist
- Orient. Name the plane, find R and L on the edges, read the slice position.
- Axial pass. Scroll the whole stack top to bottom, once fast, once slow.
- Coronal and sagittal passes. Front to back, then side to side, the same way.
- Link. For each structure of interest, place the crosshair and confirm in the other two planes.
- Window. Bone window first, then soft tissue, at every level that matters.
- Pano and cross-sections. Check the arch curve, then step the cross-section along it.
- 3D last. Use it to summarize, not to discover, and return to the slices to confirm.
- Record. Save the views that answered your question as moments, with a caption on each.
Saved moments can be replayed and shared with a study group; see saving and replaying moments. For practice beyond the bundled demo scan, see the free CBCT datasets page; the artifacts guide helps you tell a real finding from a scanner effect.
Questions students ask
In what order should I look at a CBCT scan?
Orient first, then scroll the full axial stack, then coronal and sagittal. Use the crosshair to confirm each finding in all three planes, window for bone and then soft tissue, review a panoramic reconstruction with cross-sections, and look at the 3D rendering last.
Why should I look at the 3D rendering last?
A volume rendering hides every voxel outside its threshold, so thin bone and low density roots can vanish and artifacts can look solid. If you see the slices first, you know what is really there and can use 3D to summarize it rather than to discover it.
Why is the patient's left on the right side of the screen?
Axial slices follow the radiological convention: they are shown as if you stood at the patient's feet looking towards the head. From there the patient's right is on your left. Coronal slices are shown as if you faced the patient, with the same result.
Do I really need to scroll through every slice?
Yes, at least once quickly in each plane. The structure you are looking for is rarely on the slice that opens by default, and a thin cortical plate or a canal wall can sit on a single slice. One fast pass for overview, then a slow pass through the levels that matter.
How long does reading a CBCT scan take as a student?
On an unfamiliar scan, ten to fifteen minutes for the whole routine is realistic. Once the order becomes a habit the overview passes take a minute or two and most of the time goes to the structures you are actually studying.
JawAtlas is an education and training aid. It is not a medical device and must not be used for diagnosis, treatment planning or any clinical decision.
Last reviewed 2026-10-13